Challenge #7
Shield Against Malicious Hyperlinks
Activate Safe Links in Office applications to protect your organization from harmful links in documents and emails. It’s time to fortify your defense against online threats.

Why?
The digital world is full of hidden dangers, and hyperlinks in emails and documents are among the most common ways cyber attackers try to breach our defenses. That’s why Safe Links is such an essential tool. It acts as a vigilant guard, scrutinizing every link the moment someone clicks on it, and neutralizing any lurking threats in real-time.
This isn’t just about blocking suspicious links; it’s about ensuring that every corner of our digital workspace, from emails to documents in Microsoft Teams and Office Apps, is secure against phishing attempts. Setting up Safe Links according to the best practices, like those recommended by cyber security experts, provides an extra layer of security that’s always active, and always checking. It’s about creating a safe environment where our team can click with confidence, knowing they’re protected from the hidden dangers of the internet.
How?
Setting up Safe Links in Microsoft 365 is a detailed but crucial process. Here’s how to get it done:
Step 1: Go to the Microsoft 365 Defender Portal
On your computer, launch a new browser window (Edge, Chrome), and type in https://security.microsoft.com/ and press enter.
Note: You will require Microsoft 365 administrative credentials – be sure to have the username and password ready.
Step 2: Adjust Email & Collaboration Policies
Within the Microsoft Defender Center:
- Look for and select Email & Collaboration along the left-hand side menu
- Under Email & Collaboration, look for and select Policies & rules
- In the Policies & rules window, select Threat policies
Step 3: Create a New Safe Links Policy
- Within the Threat policies window, under Policies, find and select Safe Links
- Within the Safe Links window, select the + Create
- Provide a Name for your new Safe Links policy, such as My Company Safe Links
- Feel free to also provide a description, such as Policies recommendations from Third Octet’s Level Up challenge
- Click Next
- On the next screen, we’ll be leaving users and groups blank. However, under domains, we want to enter the domain name that we use for our e-mails. As an example, ours is thirdoctet.com. Go ahead and enter your domain name and click enter.
- Now click Next.
Step 4: Set URL & Click Protection Settings for Email
- Under the URL & click protection settings, we want to enable several (many of which are already enabled), including:
- Under Email:
- Checked On: Safe Links checks a list of known, malicious links when users click links in email. URLs are rewritten by default
- Checked Apply Safe Links to email messages sent within the organization
- Checked Apply real-time URL scanning for suspicious links and links that point to files
- Checked Wait for URL scanning to complete before delivering the message
- Unchecked Do not rewrite URLs, do checks via Safe Links API only.
- Under Email:
Step 5: Set URL & Click Protection Settings for Teams
- Under the URL & click protection settings, we want to enable several (many of which are already enabled), including:
- Under Teams:
- Checked On: Safe Links checks a list of known, malicious links when users click links in Microsoft Teams. URLs are not rewritten
- Under Teams:
Step 7: Click Protection Settings
- Under the URL & click protection settings, we want to enable several (many of which are already enabled), including:
- Under Click Protection Settings:
- Checked Track user clicks
- Unchecked Let users click through the original URL
- Under Click Protection Settings:
- Now click Next
Step 6: Set URL & Click Protection Settings for Office 365 Apps
- Under the URL & click protection settings, we want to enable several (many of which are already enabled), including:
- Under Office 365 Apps:
- Checked On: Safe Links checks a list of known, malicious links when users click links in Microsoft Office apps. URLs are not rewritten
- Under Office 365 Apps:
Step 8: Save Your Settings
- Within the Notification window, we can select Use the default notification text, and select Next
- We can now review and validate our settings.
- Once you are satisfied, click Submit and then Done.
- We’ll then return to the main window where we’ll see our new policy as enabled (status = on).
While you’re here…
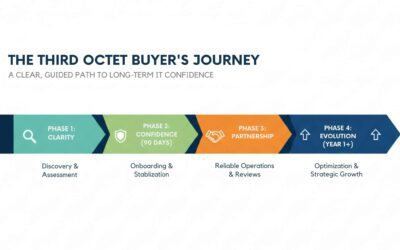
How We Work at Third Octet: A Clear, Predictable IT Partnership
A clear, guided path from first conversation to long-term IT confidence A proven approach trusted by nearly 100 Canadian SMBs to simplify, secure, and modernize IT. Without surprises. This page is for growing SMBs (typically 25–150 employees) who have outgrown “basic”...

Protecting Cash Flow and Continuity: Why SMBs Need Cyber Insurance Now
A fundamental question we hear more than ever On a recent call with one of our long-time clients, their finance lead paused and asked a simple, yet loaded question: "We're a small business. Is cyber insurance really necessary?"It's a fair question. A question that...

Five Days to Recovery: What This Ransomware Incident Revealed About Co-Managed IT
A story of shared hosting, broken assumptions, and the 'blind spot' in co-managed accountability Ransomware hit shared infrastructure managed by another provider.Backups failed.The business went offline.Operations were restored in five business days. Here’s what...